CentOS 7.2安装ActiveMQ 5.14.5
CentOS 7.2安装ActiveMQ 5.14.5
1. 下载安装包
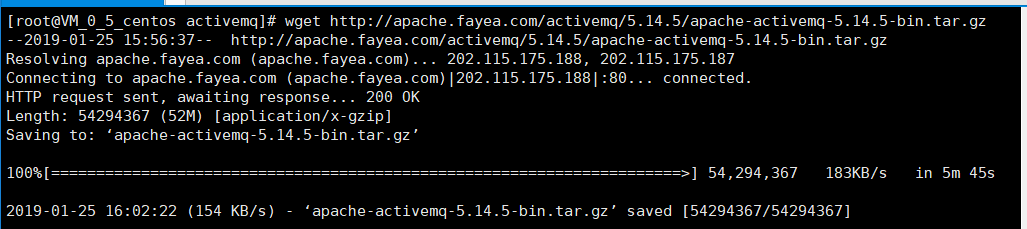
[root@VM_0_5_centos activemq]# wget http://apache.fayea.com/activemq/5.14.5/apache-activemq-5.14.5-bin.tar.gz |
具体版本下载可进入http://apache.fayea.com/activemq/查看
2. 解压压缩包
[root@VM_0_5_centos activemq]# tar -zxvf apache-activemq-5.14.5-bin.tar.gz |

3. 进入bin文件下的Linux文件下启动
[root@VM_0_5_centos activemq]# ls |

4. 查看启动状态
activemq未启动 |
5. 查看启动日志,解决报错
[root@VM_0_5_centos bin]# ./activemq console |
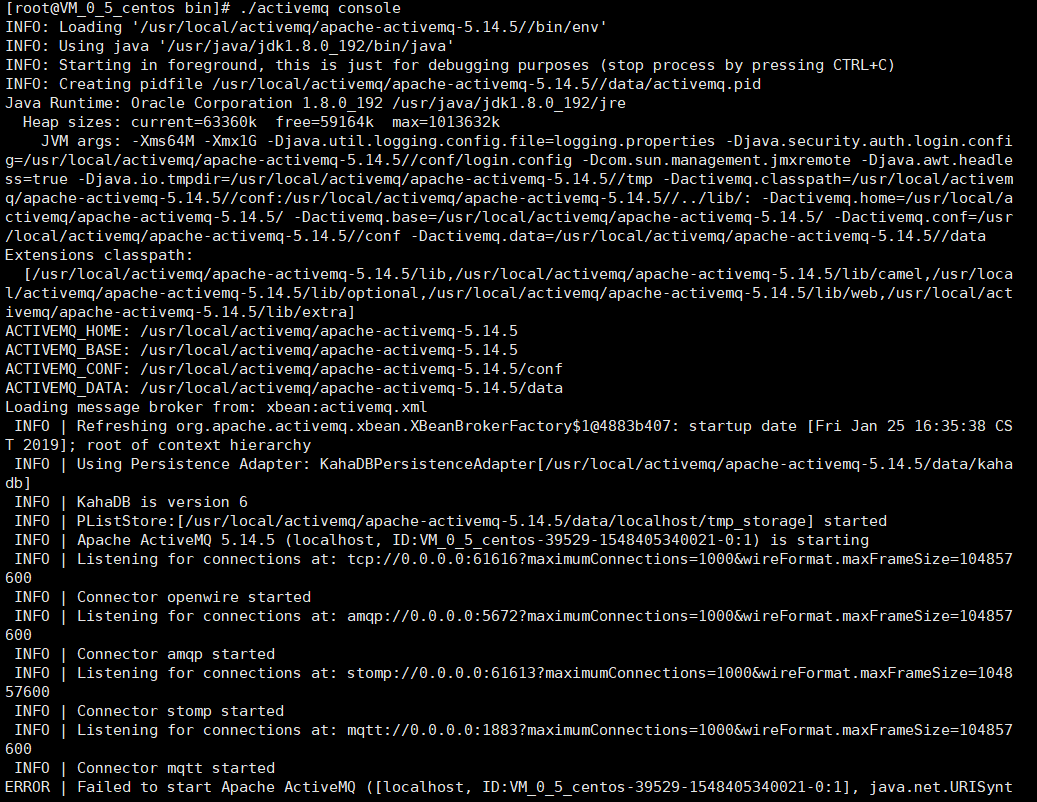
- 报错原因-服务器主机名有下划线存在特殊字符
ERROR | Failed to start Apache ActiveMQ ([localhost, ID:VM_0_5_centos-39529-1548405340021-0:1], java.net.URISyntaxException: Illegal character in hostname at index 7: ws://VM_0_5_centos:61614?maximumConnections=1000&wireFormat.maxFrameSize=104857600) |
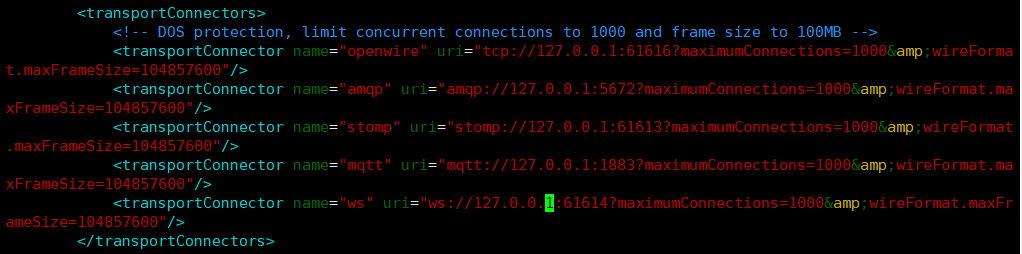
- 修改conf目录下的activemq.xml文件
[root@VM_0_5_centos bin]# cd .. |
始终报错,修改etc/hosts文件,删除映射到VM_0_5_centos的配置
hostnamectl set-hostname XXX
或者直接设置host名称然后reboot重启
重新启动,运行activemq,查看运行状态
[root@VM_0_5_centos bin]# ./activemq status |

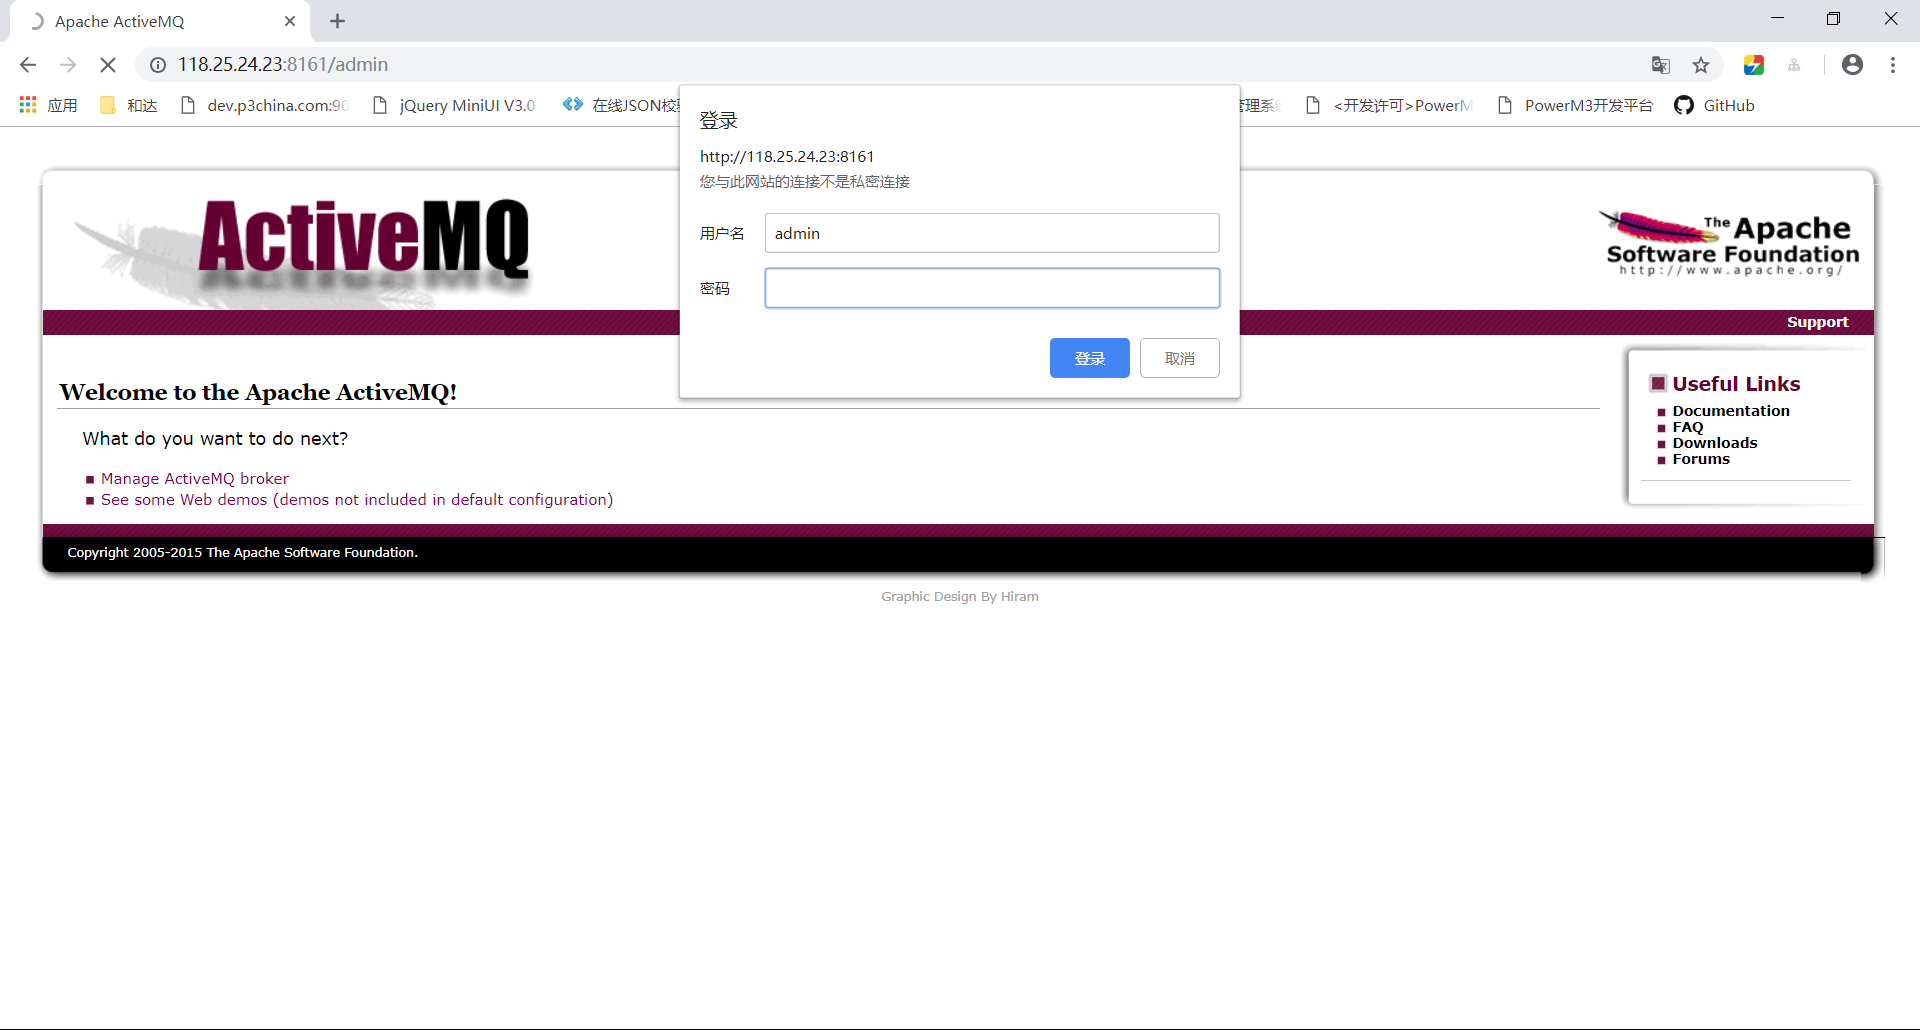
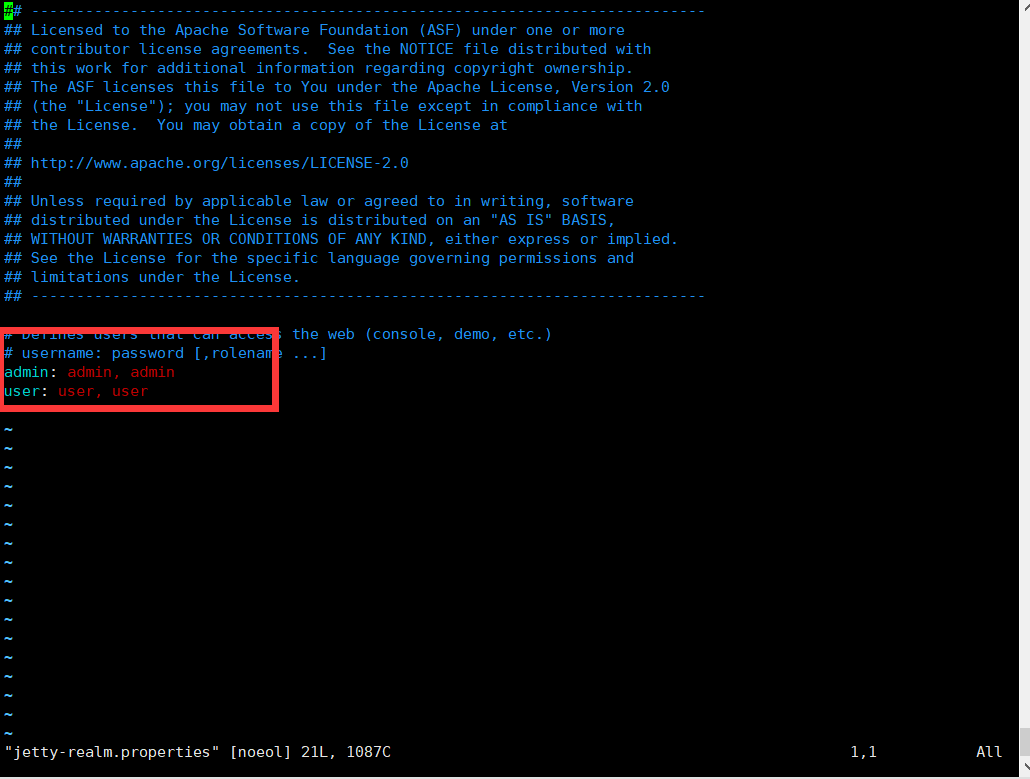
- 访问8161管理员页面,使用配置的账号密码登录
- 进入conf文件夹下配置文件,修改密码
[root@VM_0_5_centos apache-activemq-5.14.5]# cd conf/ |
6. SpringBoot整合ActiveMQ
- maven引入jar包
<!--整合activemq--> |
- 编辑配置文件
spring: |
window客户端可使用telnet 命令查看端口是否可以访问
telnet IP 端口号 例:telnet 127.0.0.1 8080
编写服务提供方
package com.joey.activemq;
import org.springframework.beans.factory.annotation.Autowired;
import org.springframework.jms.core.JmsMessagingTemplate;
import org.springframework.stereotype.Component;
import javax.jms.Destination;
/**
* 〈服务者〉
*
* @author Joey
* @create 2019-01-28
* @since 1.0.0
*/
public class Producer {
private JmsMessagingTemplate jmsMessagingTemplate;
public void sendMessage(Destination destination, final String message){
jmsMessagingTemplate.convertAndSend(destination, message);
}
}编写消费方
package com.joey.activemq;
import org.springframework.jms.annotation.JmsListener;
import org.springframework.stereotype.Component;
/**
* 〈消费者〉
*
* @author Joey
* @create 2019-01-29
* @since 1.0.0
*/
public class Consumer {
public void receiveMsg(String message){
System.out.println("message:"+message);
}
}编写控制器
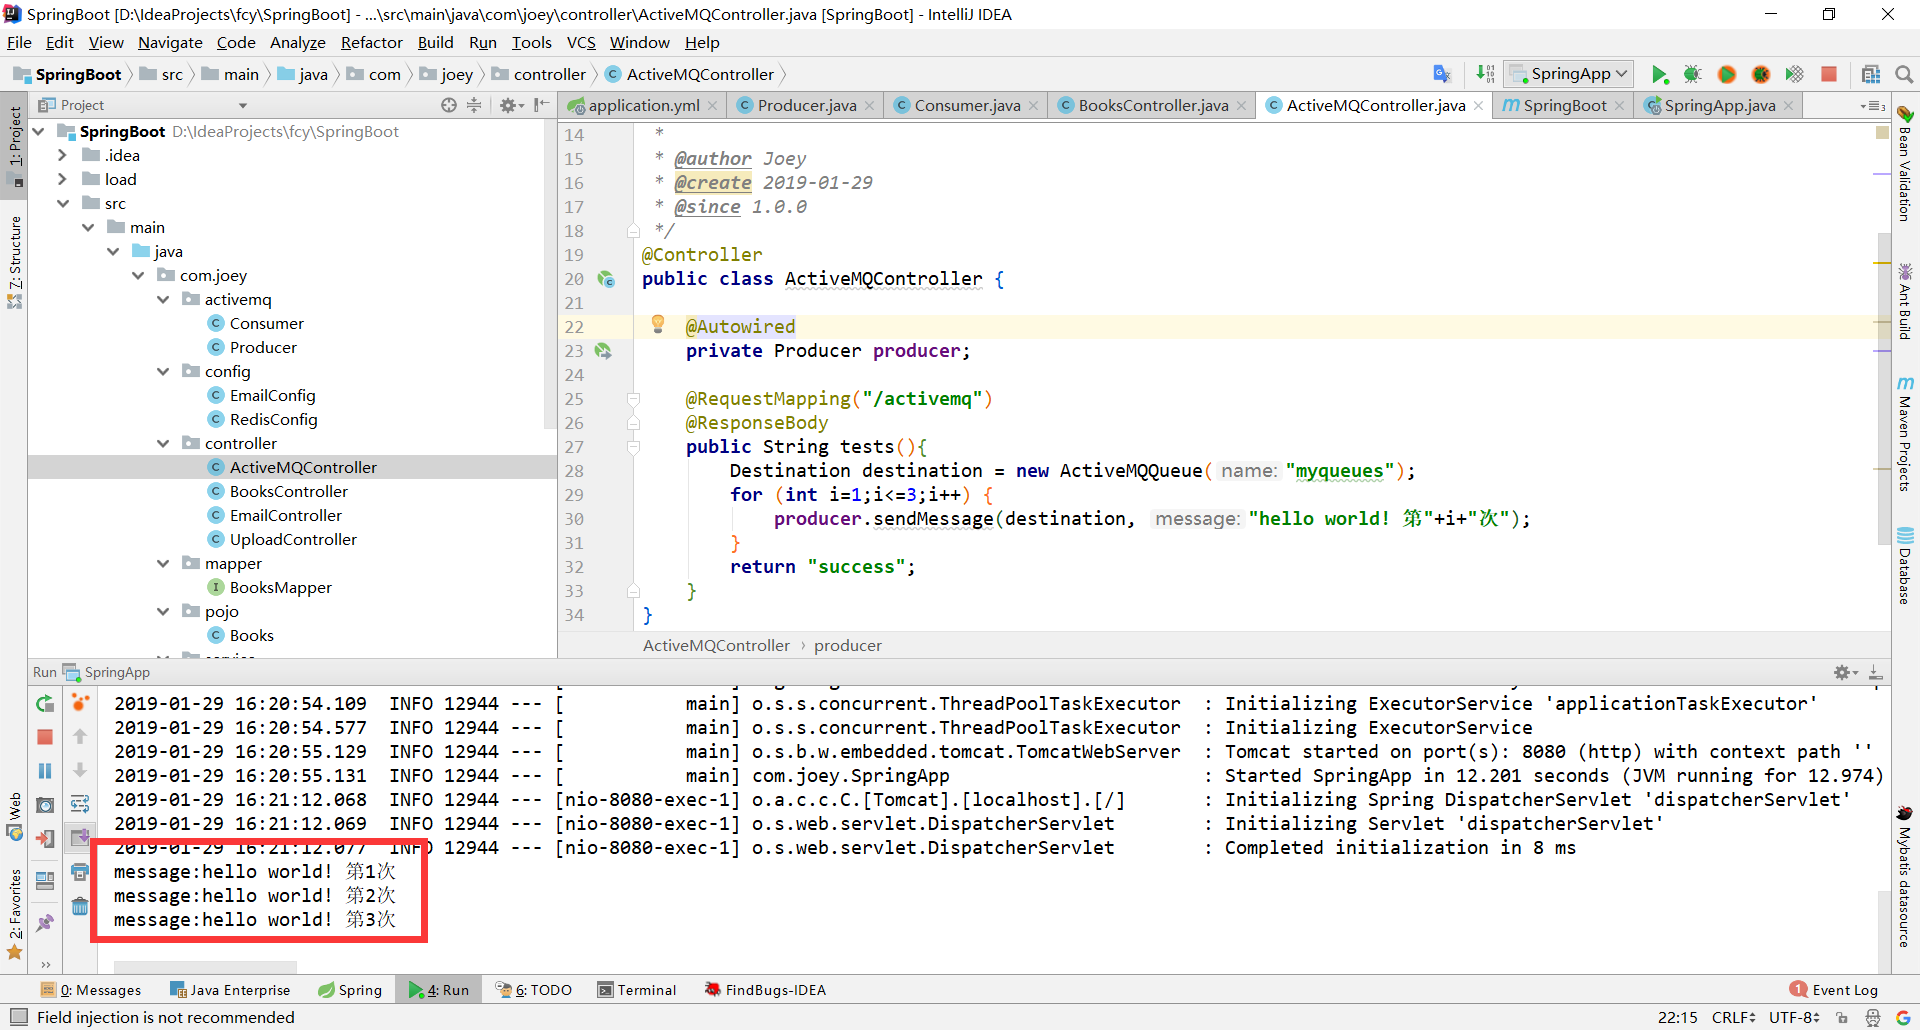
package com.joey.controller;
import com.joey.activemq.Producer;
import org.apache.activemq.command.ActiveMQQueue;
import org.springframework.beans.factory.annotation.Autowired;
import org.springframework.stereotype.Controller;
import org.springframework.web.bind.annotation.RequestMapping;
import org.springframework.web.bind.annotation.ResponseBody;
import javax.jms.Destination;
public class ActiveMQController {
private Producer producer;
public String tests(){
Destination destination = new ActiveMQQueue("myqueues");
for (int i=1;i<=3;i++) {
producer.sendMessage(destination, "hello world! 第"+i+"次");
}
return "success";
}
}访问成功

本博客所有文章除特别声明外,均采用 CC BY-NC-SA 4.0 许可协议。转载请注明来自 Joey!